The short answer: treat each job as a sequence, not a single puzzle. Read the hand-in, identify the device family, inspect before ordering, clean and replace only what the evidence supports, reassemble carefully, then return to the customer conversation before taking the next job. ReStory rewards patience because the shop, the finances and the story all move together.
02
What the game is actually asking you to manage
ReStory: Chill Electronics Repairs places you in a small electronics repair shop in mid-2000s Tokyo. The official listing describes a repair system built around taking devices apart, cleaning them, replacing faulty parts and assembling them again. It also describes a shop-management layer: customers bring devices in, you manage money, and an in-game web browser helps you hunt for spare parts.
That means a good repair guide needs to answer two different questions. The first is mechanical: what should I inspect and in what order? The second is managerial: is this order worth taking now, and what does it cost me in time, cash or customer goodwill? A page that only lists a final result is less useful than a page that explains how to reach a reliable result from a fresh hand-in.
The shop also has a narrative layer. The Steam description specifically calls out customers with unique stories, choices that can impact their lives and a replayable branching storyline with multiple endings. Treat dialogue as part of the job record. When a customer gives you a morally uncomfortable clue, write down the context before clicking through the response.
03
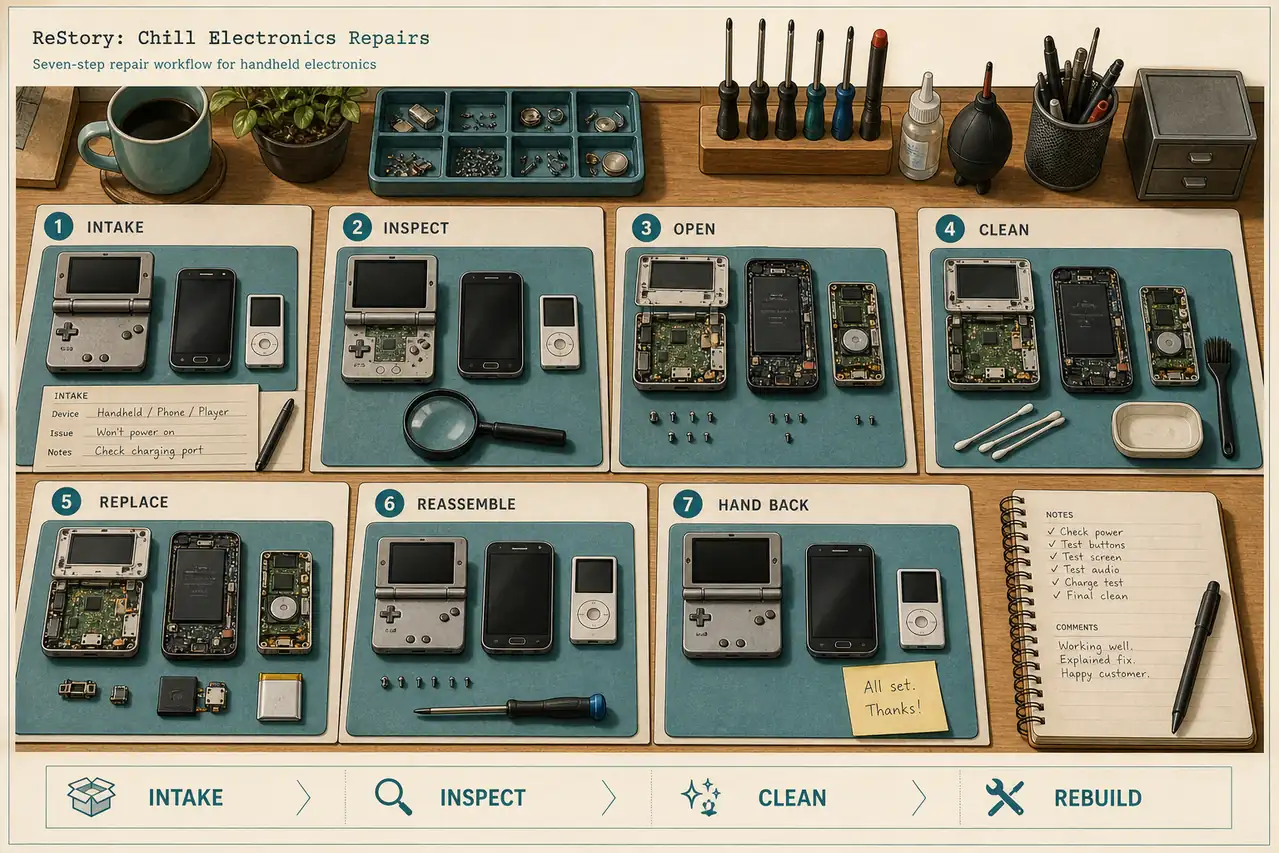
The seven-pass repair workflow
Read the hand-in twice
The first pass is for the customer story and urgency. The second is for the physical clue: device type, symptoms, prior damage or a named accessory. Do not rush to the parts browser before you know what the job is asking.
Classify the device
Put the item into a family such as console, handheld, phone, camera, music player or home appliance. The family changes what you should inspect first and gives you a sensible starting point when the item name is unfamiliar.
Open and inspect before shopping
Use the available toolset to expose the device and look for the failed area. A shopping trip based on a guess wastes money and can leave you with a drawer full of plausible but unused components.
Clean the safe surfaces
Separate cleaning from replacement. Remove visible grime and oxidation where the repair loop allows it, then re-check the condition. A clean contact or shell can be enough; replacing a part without checking can turn a cheap fix into an expensive one.
Replace only the supported failure
Compare the discovered fault with the part you are about to buy. Record the part family in your checklist, especially when a job has more than one plausible module. This is where the database pages are most useful.
Reassemble in a deliberate order
Before closing the device, confirm the part, fasteners and visible connections. If the current build presents a confirmation step, use it. Reassembly is not a formality: it is the point where a correct diagnosis can still be lost.
Return to the customer and log the choice
Complete the hand-off, then record any dialogue decision, unusual discovery or ending flag in the customer page. This turns a one-time playthrough into a route you can compare on a later run.
04
Where a first run usually goes wrong
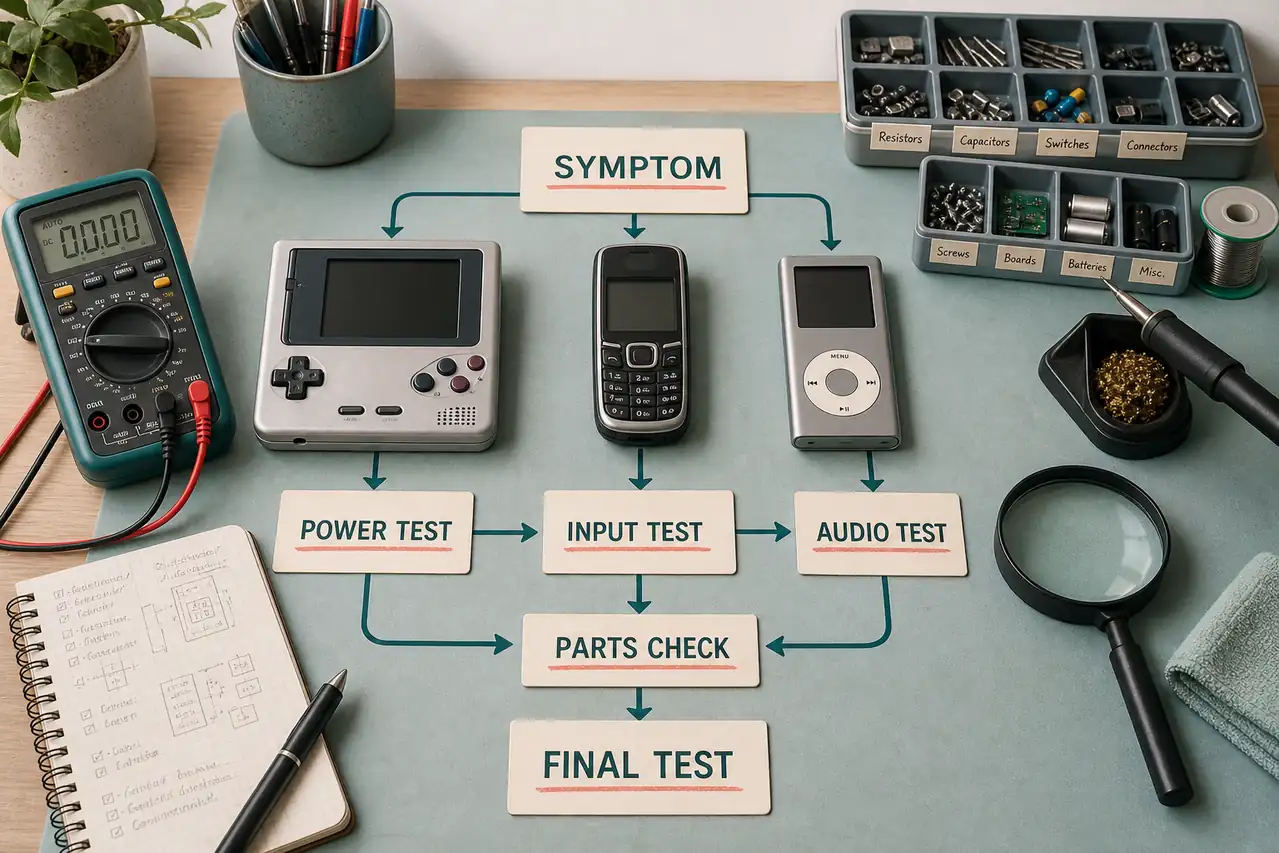
The most common mistake is treating the parts browser as a catalogue to browse for fun. In a small shop, every unneeded order competes with the next job. Inspect first, then buy. If you are unsure, leave a note such as "display symptom, board not confirmed" instead of converting a hunch into a purchase.
The second mistake is collapsing cleaning, replacement and reassembly into one mental step. When something fails after the repair, you need to know which phase changed the state. A three-line note is enough: what was dirty, what was replaced and what was tested. That habit makes a second attempt much faster.
The third mistake is clicking through customer dialogue as if it were a reward screen. The store description gives two useful examples: a disturbing find inside a former gangster's phone and a lovestruck student who may need help confessing to a crush. Both examples signal that the customer decision is part of the route, not decoration after the repair.
- Do not order a part before the device has been inspected.
- Do not assume a dirty contact and a failed module are the same problem.
- Do not overwrite a customer choice with memory; keep a route note.
- Do not read a generic device family entry as an official hidden solution.
05
Device-family lookup: the fastest starting point
The official listing names a broad range of nostalgic devices inspired by consoles, handhelds, phones, cameras, music players and home appliances. These families are the stable part of the public information. Individual item names, part labels and exact puzzle rules can change with updates or may only be visible in-game, so this wiki keeps the family index separate from verified item solutions.
Open the closest family page before opening the device. It gives you the first inspection target, the parts that deserve a second look and a short checklist you can keep in the browser. If the family page says "needs in-game verification", that is deliberate: it marks a research gap instead of filling it with a confident guess.
06
Customers, choices and endings
A repair can be technically correct and still lead to a different story. Use the customer page as a decision log. Write down the customer clue, the item involved, the response you chose and the immediate result. On a replay, compare the choice before you try to reproduce an ending.
The database currently records the two customer examples explicitly described by Steam, plus a neutral route-tracking template for future verified entries. It does not publish invented ending names. The official page confirms multiple endings and a branching storyline; the exact route map belongs here only after it has been tested against the current release.
07
Money, orders and a tidy shift
The shop-management layer changes how you should pace repairs. Keep a small cash buffer for a job that reveals a second failure, and use the in-game web browser when you have a clear part target. The official description also mentions in-person and online orders, so a shift is not only a sequence of bench animations; it is a queue that needs room for the next decision.
A simple practical rule is to finish the most certain repair before experimenting with an ambiguous one. When the game offers several jobs, record the device family, expected part risk and customer-story importance. This guide cannot promise the game's hidden payout formula, but the record helps you compare what actually happened in your own save.
08
How to use this wiki without losing the plot
Use the search box for a noun, not a sentence: "phone", "battery", "student" or "Akiba". Open the entry, tick the checks you have completed and keep the page open while you work. The checklist is stored locally in your browser; it does not require an account and it is not synced between devices.
Read the evidence label before trusting a detail. "Verified from official listing" means the claim is directly supported by Steam's public store or app data. "Working note" means it is a useful workflow or an editorial structure. "Needs in-game verification" means the page is ready for a community-confirmed detail but intentionally stops short of claiming one.
09
What is confirmed, and what is still open
Confirmed at the last review: the game launched on Steam on 6 August 2026; it is a single-player indie simulation from Mandragora and tinyBuild; the public feature description covers cleaning, replacing parts, reassembly, a spare-parts browser, multiple order types, customer stories, branching choices and officially licensed Atari consoles; Steam lists 50 achievements.
Still open: a complete named-device catalogue, exact part inventory, exact unlock conditions for every achievement, a verified customer-to-ending route map and the final shape of any planned content. Those are the pages most likely to change during the launch window. This site will update them from a source or a reproducible in-game check rather than copying an unverified list.
09
Devices: first inspection table
| Device family | What to inspect first | Evidence status |
|---|---|---|
| Game consoles | Start with the external shell, controls and visible connectors before you order a board or display part. | Verified from official listing |
| Handheld devices | Treat the screen, battery and buttons as distinct clues; do not let one symptom decide the whole repair. | Verified from official listing |
| Mobile phones | Phone jobs can carry story context as well as hardware symptoms. Log the customer clue before you choose a dialogue response. | Verified from official listing |
| Cameras | Keep lens, display and power symptoms separate. A visual problem does not automatically identify the display module. | Verified from official listing |
| Music players | Check power, controls and the audio path separately. Keep a note of whether the symptom is silence, input or physical damage. | Verified from official listing |
| Home appliances | Treat power and shell condition as the first pass, then use the discovered failure to narrow the part role. | Verified from official listing |
10
FAQ
What is the best ReStory Chill Electronics Repairs repair order?
Read the customer hand-in, classify the device, inspect before shopping, clean, replace the confirmed fault, reassemble, then log the customer choice. The exact interaction names can vary by item, but the sequence keeps diagnosis separate from spending.
Does ReStory have a complete device list?
Steam confirms consoles, handhelds, phones, cameras, music players and home appliances. This wiki indexes those public families first and labels individual entries as verified only when a current-build check supports them.
How do I find spare parts in ReStory?
Use the in-game web browser after you have inspected the device and identified a likely part family. Buying from a symptom alone is the easiest way to waste shop money.
Do customer choices change the ending?
The official Steam description says the storyline branches, choices can affect customers and the game has multiple endings. Keep a decision log; this site does not claim a complete route table until each branch is tested.
How many Steam achievements does ReStory have?
Steam currently lists 50 achievements. The achievements page surfaces named entries that are visible in the public app data and gives you a local checklist without pretending to know an unverified unlock condition.
Is this an official ReStory wiki?
No. It is an independent fan-made reference. ReStory, its name and its artwork belong to their respective owners; the source links point to official public information where available.